前回、仮想マシンにUbuntu 14.04をインストールしました。
続いて環境整備。
まずはIPアドレスをDHCPから固定アドレスに変更。うちの宅内LANではSSHしたりリモートデスクトップしたりするので、固定アドレスの方が便利なんですよね。
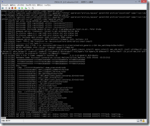
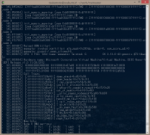
/etc/network/interfaces を編集。
# This file describes the network interfaces available on your system
# and how to activate them. For more information, see interfaces(5).

# The loopback network interface
auto lo
iface lo inet loopback

# The primary network interface
auto eth0
#iface eth0 inet dhcp
iface eth0 inet static
        address 192.168.1.28
        netmask 255.255.255.0
        gateway 192.168.1.1
        dns-nameservers 192.168.1.1
# This is an autoconfigured IPv6 interface
iface eth0 inet6 auto
それから既存のVMからホームディレクトリをコピー。
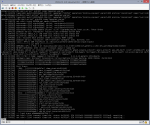
~>$ scp .bash* .emacs .inputrc .profile 192.168.1.28:~/
nashi@192.168.1.28's password:
.bash_aliases                                                    100%  293     0.3KB/s   00:00
.bash_history                                                    100% 4808     4.7KB/s   00:00
.bash_logout                                                     100%  220     0.2KB/s   00:00
.bashrc                                                          100% 3612     3.5KB/s   00:00
.emacs                                                           100% 5664     5.5KB/s   00:00
.inputrc                                                         100%  140     0.1KB/s   00:00
.profile                                                         100%  675     0.7KB/s   00:00
その後あれこれ常用のパッケージをインストール。
で一通り準備が整ったら一旦この状態を保存。
保存にはHyper-Vの「エクスポート」を使いました。

ある時点の状態を簡単に保存しておけるのが仮想マシンの便利なところですよね。
さてここまで来てやっと気づいたのですが、仮想マシンのプロセッサとメモリの設定が既定値のままでした。
仮想プロセッサの数を1→2へ変更。

動的メモリの最大RAMを4Gbytesに制限。

以上でUbuntu 14.04の仮想マシンが完成しました。
つづく。